I currently don’t have access to my Pi, so I thought it would be better to make the website in the meanwhile. I want the led control board to kind of look like a throttle setup, where the user can change the RGB values with a scrubber as well as type in values as well. With only a couple of minutes, I came up with this code,
<div id="roomColorControl">
 <table>
   <tr>
     <td><center>R</center></td>
     <td><center>G</center></td>
     <td><center>B</center></td>
   </tr>
   <tr>
     <td><input id="ledRvalue" name="ledRvalue" class="ledValue" type="number" max="255" min="0"></td>
     <td><input id="ledGvalue" name="ledGvalue" class="ledValue" type="number" max="255" min="0"></td>
     <td><input id="ledBvalue" name="ledBvalue" class="ledValue" type="number" max="255" min="0"></td>
   </tr>
   <tr>
     <td><center><input id="ledRslider" name='ledRslider' type='range' min="0" max="255" step="5" class="ledSlider"></center></td>
     <td><center><input id="ledGslider" name='ledGslider' type='range' min="0" max="255" step="5" class="ledSlider"></center></td>
     <td><center><input id="ledBslider" name='ledBslider' type='range' min="0" max="255" step="5" class="ledSlider"></center></td>
   </tr>
 <table>
</div>
The reason why I went with a table format is that it will be easier to handle, and it gives me the ability to put the text box on top of the slider without much hassle in the CSS area.
Speaking of CSS, the slider’s default position is horizontal, and I had to make it vertical, so I added this into my CSS file:
.ledSlider {
    -webkit-appearance: slider-vertical;
    writing-mode: bt-lr;
    width: 8px;
    height: 175px;
    padding: 0 5px;
}
With a little CSS here and there, the result is this:
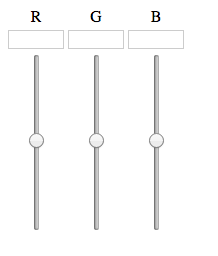
Now, with a little Javascript and PHP magic, hopefully this can be used to control the lights!