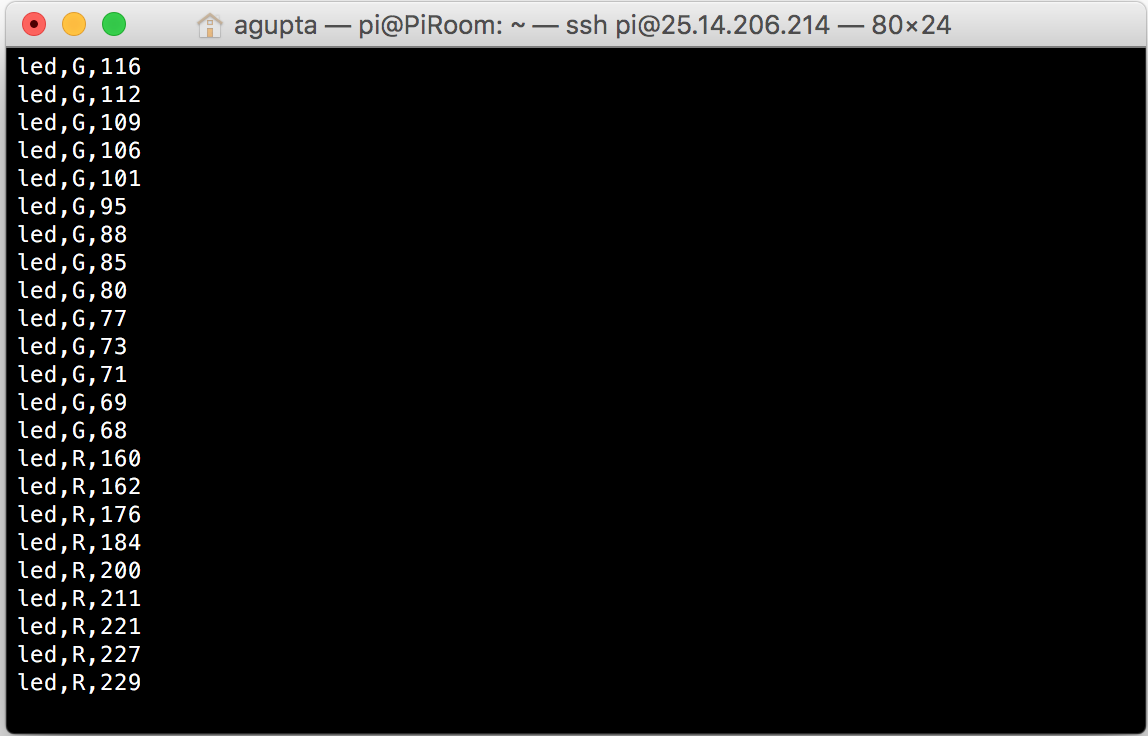
The parts finally came in, and I made the circuit that I designed earlier. I only made the circuit out of a breadboard, and I’ll probably transfer it to something a bit more permanent within the week. However, the code works, and this is the result:
Setting up the basic website to power the whole room
The parts finally came in, and I made the circuit that I designed earlier. I only made the circuit out of a breadboard, and I’ll probably transfer it to something a bit more permanent within the week. However, the code works, and this is the result:
Quick update….
On the bus ride home, I finally got this thing working. Although I really can’t show it in a picture of a gif, all of the values from the clients are stored onto the server, and pins’ PWM is activating.
It also turns out that there is a shortage of a whopping two transistors. I’m still trying to scrounge the internet for deal which doesn’t result in me being ripped off, so it might be a while before I can get this thing hooked up and working.
Another quick point:
Turns out that my LED strip that I bought is only 16′, not nearly enough to cover the perimeter of my room, so I’ll have to bite the bullet and buy another one of those as well.
Finally, you can view all of my code (and my somewhat entertaining commit messages) at my github.
I tried and tried to get the Websocket working, but I just couldn’t get the thing to work. Back to Google.
I found a different source where the author got his code to work with the Pi, however it was made for a different purpose. After tweaking the code, I finally got what I have been trying to achieve for weeks:

Not only that, turns out my JavaScript was also working pretty nicely, and I was actually receiving the data values from the user as well:
So far, this is looking good. I just need to make all the clients synchronous and parse the data above.
As always, all of my code and updates can be found on my github.
I was doing a basic outline of what I wanted this application to do, and I realized that I wanted a hardware switch for the lights as well as well as the software interface.
If there are two different interfaces, that means there will be a discordance with the hardware values compared to the web values for the lights. The only way then, to make sure everything is a-ok, is to make sure that the clients are always synced to the server, so the hardware values change the values on the clients’s webpages.
One easy and obvious solution is to simply refresh the webpage every x seconds with JavaScript, but that wouldn’t give realtime feedback, which kind of ruins the whole “home of the future” experience for me. I then looked into sending AJAX requests every x seconds, but realized that if I have more than 5 or so client webpages open at the same time, my pi would literally go on fire.
I could go around that by using a service such as pusher, which basically outsources the request to an off-site server, but I would rather buy a server than pay for a service such as pusher (huge fan of not buying things :D)
After a little more research, I found that the websockets are the way to go. They basically open a tunnel between the server and the client, where both the client and the server can communicate with each other in realtime. An easy application for this would be a simple chat application.
Since, my Pi is already built with Apache, I decided to use PHP to run my websocket server (plus PHP is the language I’m best at).
I used a library for the basic websocket functionality, which can be found here.
After that, I realized that I needed to run the PHP locally, not every time a client connects to the server. I then added another class and a small amount of code which can be run from the command line:
require_once 'WebSockets.php';

class Server extends WebSocketServer {

protected function process ($user, $message) {
$this->send($user,$message);
}
protected function connected ($user) { }
protected function closed ($user) { }
}

$server = new Server("localhost", "1738");

try {
$server->run();
}
catch (Exception $e) {
$server->stdout($e->getMessage());
}
I opened up the Pi and ran this file, which gave me the following output:
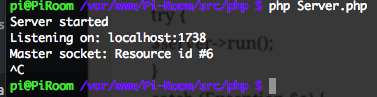
So far, it looks like the server is running smoothly. Now, I need to connect my client with my server and get them synchronous.
If you are thinking that this is overkill for a simple application such as this, that I don’t really need a hardware interface, I would have to tell you that a websocket is a lot more integral to the whole project than it initially appears. If there are multiple tabs open with the server control panel, and there isn’t a websocket set up, then the tabs would never be updated, which would be very confusing to the user. In this case, a websocket not only provides basic functionality, but also increases the expandability of the project exponentially.
I still don’t have access to my Pi(s), but I decided to work on the electronics a bit so that I could hit the ground running when I do get access.
I’m thinking about using PWM (pulse width modulation) the LEDs from my Pi. I really don’t know how the stability will be affected with the pins running PWM for hours at a time, but I guess I’m going to find out.
Quick tangent about PWM. PWM basically turns the pins on and off really quickly to output a signal that isn’t 0% or 100% power. I will most likely be using the WiringPi or the pigpio libraries to pull this off with the Pi. However, the Pi only outputs 3.3v with it’s GPIO pins (not the 5v rails), which is not nearly enough to power the LED strip.
I decided to use 3 transistors, this allows me to still use the Pi’s PWM, and also let it deal with higher voltages. I could have gone with solid state relays, but I’m not really pushing that much current to justify the choice. I’m also aware of the added “lag” when using more parts, especially transistors, but I seriously doubt that this “lag” will affect the LED’s performance, or affect enough that the human eye can sense that something is wrong.
With all of this in mind, my current idea for the LED light controller is as follows:
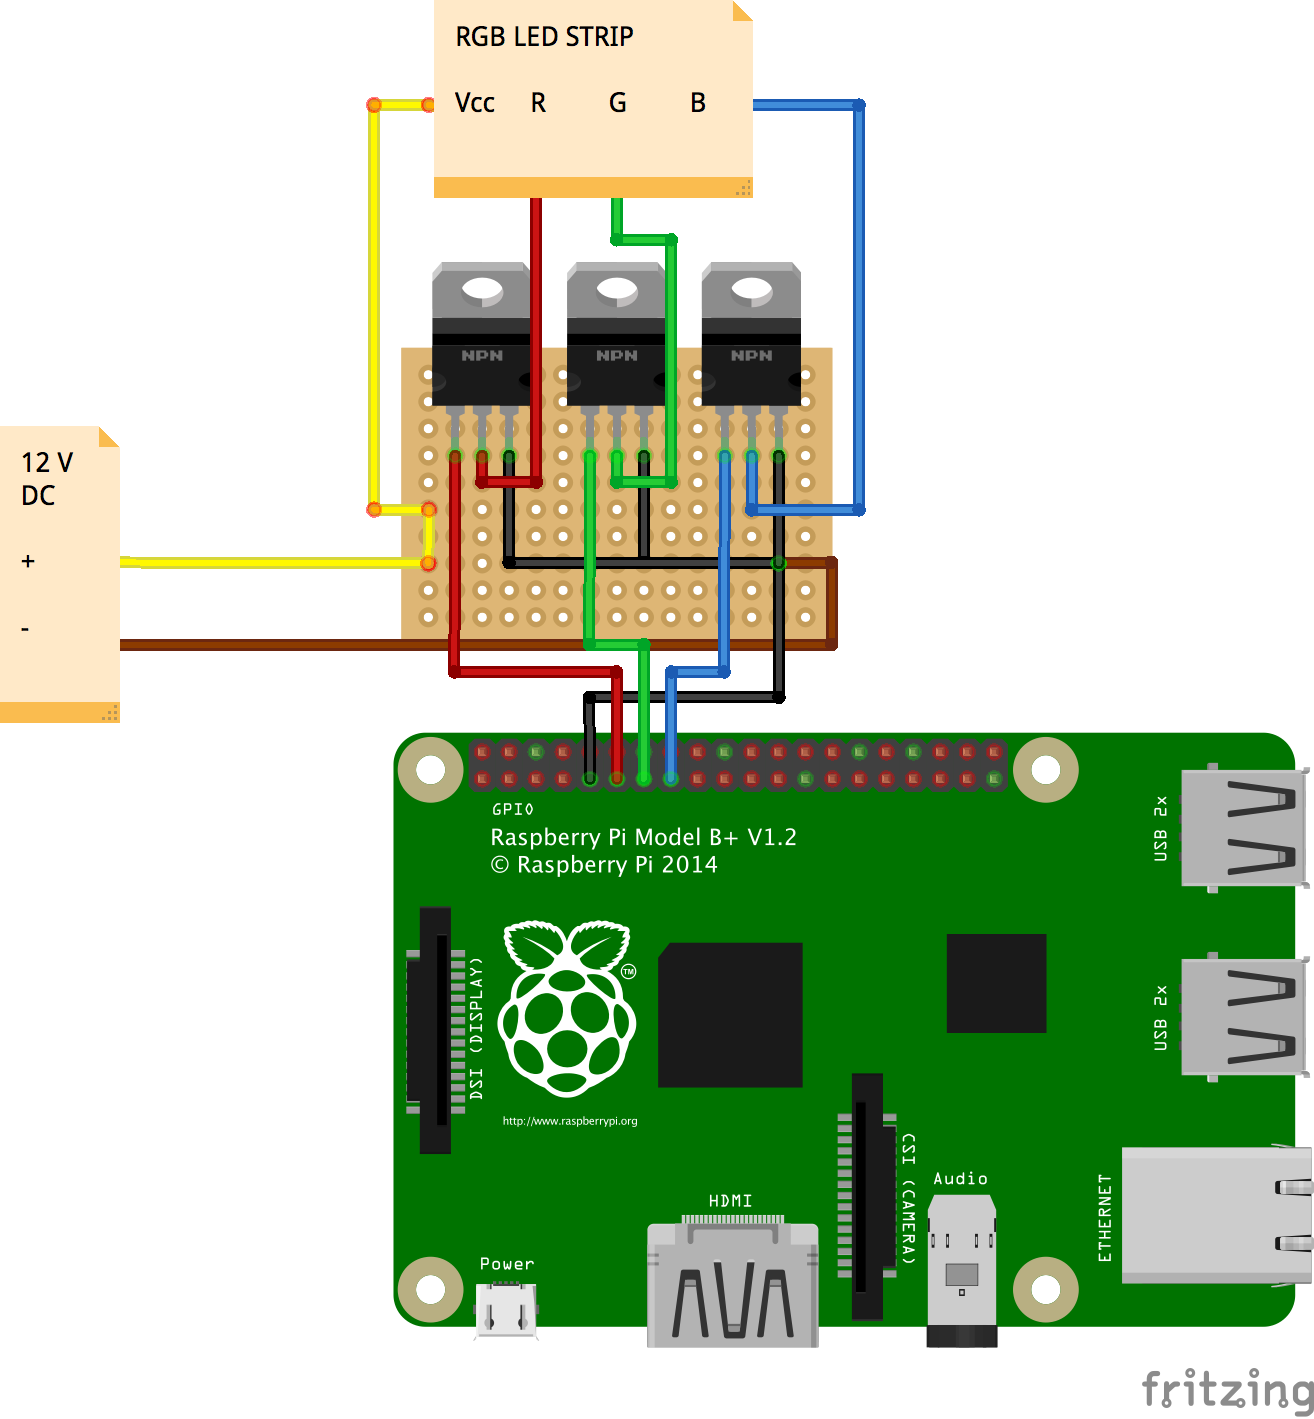
I’m trying to do some research on whether or not I will have to cool the transistors, as they should theoretically be getting very hot. Also, it should be noted that the protoboard will be cut to be smaller than shown, I just didn’t know the size before hand. Hopefully I can get the parts ASAP and start building soon!
I’m still away form my Pi, but I was still working on my basic website. I wanted the sliders and the input boxes to be in accordance, so that there would be no code clashes in the future. To pull this off, I added this to my slider code:
<input id="ledRslider" name='ledRslider' type='range' min="0" max="255" step="5" class="ledSlider" oninput="ledSlider(this.value, 'R')">
<input id="ledGslider" name='ledGslider' type='range' min="0" max="255" step="5" class="ledSlider" oninput="ledSlider(this.value, 'G')">
<input id="ledBslider" name='ledBslider' type='range' min="0" max="255" step="5" class="ledSlider" oninput="ledSlider(this.value, 'B')">
The main thing to pay attention to is the
oninput="ledSlider(this.value, 'R')"
This bit of code sends the current value of the slider as well as the color of the slider to a Javascript function. The value part is obvious, but I also made the sliders send their color so that there could only be one function, opposed to three.
The corresponding JS function looks like so:
function ledSlider(val, color) {
    document.getElementById('led' + color + 'value').value = val;
}
As seen in the code above, the input box gets updated as the slider changes, and all of the input boxes will get changed to their corresponding slider, all with just one function.
So far, the end result looks like so:
Now, I have to make a XMLHTTPRequest from the JS to the corresponding PHP, which will then execute the a command from the Pi, which will finally change how the lights work.
The party has just begun.
I currently don’t have access to my Pi, so I thought it would be better to make the website in the meanwhile. I want the led control board to kind of look like a throttle setup, where the user can change the RGB values with a scrubber as well as type in values as well. With only a couple of minutes, I came up with this code,
<div id="roomColorControl">
 <table>
   <tr>
     <td><center>R</center></td>
     <td><center>G</center></td>
     <td><center>B</center></td>
   </tr>
   <tr>
     <td><input id="ledRvalue" name="ledRvalue" class="ledValue" type="number" max="255" min="0"></td>
     <td><input id="ledGvalue" name="ledGvalue" class="ledValue" type="number" max="255" min="0"></td>
     <td><input id="ledBvalue" name="ledBvalue" class="ledValue" type="number" max="255" min="0"></td>
   </tr>
   <tr>
     <td><center><input id="ledRslider" name='ledRslider' type='range' min="0" max="255" step="5" class="ledSlider"></center></td>
     <td><center><input id="ledGslider" name='ledGslider' type='range' min="0" max="255" step="5" class="ledSlider"></center></td>
     <td><center><input id="ledBslider" name='ledBslider' type='range' min="0" max="255" step="5" class="ledSlider"></center></td>
   </tr>
 <table>
</div>
The reason why I went with a table format is that it will be easier to handle, and it gives me the ability to put the text box on top of the slider without much hassle in the CSS area.
Speaking of CSS, the slider’s default position is horizontal, and I had to make it vertical, so I added this into my CSS file:
.ledSlider {
    -webkit-appearance: slider-vertical;
    writing-mode: bt-lr;
    width: 8px;
    height: 175px;
    padding: 0 5px;
}
With a little CSS here and there, the result is this:
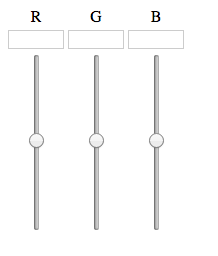
Now, with a little Javascript and PHP magic, hopefully this can be used to control the lights!