PiRoom – Natural Alarm [Concept]

This is the next phase in the PiRoom project. I glossed over this earlier, so I’ll expand on the idea of natural alarm. A natural or light-up alarm clock basically simulates how the sun rises to mess with the hormones in our body to give a more relaxed wakeup.

While these things cost around $150, I thought I might as well make my own (as I already have the LED framework made).

As GALE is still being made, I’ll have to make a system that isn’t based off of user sound input. Instead, I’m going to use Google Calendar. The goal is to have a calendar of all of the wake-up times, and use that information to remotely control the Pi and in turn, the alarm clock.

I’m still trying to work out the API (google is brutal with the process), and I’ll keep posting updates.

PiRoom – LED Lighting [Nearly Done!]

Quick update….

On the bus ride home, I finally got this thing working. Although I really can’t show it in a picture of a gif, all of the values from the clients are stored onto the server, and pins’ PWM is activating.

It also turns out that there is a shortage of a whopping two transistors. I’m still trying to scrounge the internet for deal which doesn’t result in me being ripped off, so it might be a while before I can get this thing hooked up and working.

Another quick point:

Turns out that my LED strip that I bought is only 16′, not nearly enough to cover the perimeter of my room, so I’ll have to bite the bullet and buy another one of those as well.

Finally, you can view all of my code (and my somewhat entertaining commit messages) at my github.

PiRoom – LED Lighting [Update]

I tried and tried to get the Websocket working, but I just couldn’t get the thing to work. Back to Google.

I found a different source where the author got his code to work with the Pi, however it was made for a different purpose. After tweaking the code, I finally got what I have been trying to achieve for weeks:

Websocket Connected

Not only that, turns out my JavaScript was also working pretty nicely, and I was actually receiving the data values from the user as well:

Websocket Output

So far, this is looking good. I just need to make all the clients synchronous and parse the data above.

As always, all of my code and updates can be found on my github.

PiConnect [Concept]

I recently moved to a new house, and with a new house, there is a new system to adapt to. The two biggest changes that affect me the most are the new wifi and the sound setup.

First the sound.

The previous owners of the house put in this great speaker system that is wired for the whole house:

Bose Speakers

The main problem of this, however, is that the whole system is controlled from a rather old pre-amp:

House Preamp

Because of its age, we physically have to go and plug our devices into it in order to listen to music around the whole house (because plugging things in is so last decade.)

This isn’t that big of a problem, however, I feel the whole experience can be streamlined by making the whole system wireless, which will not only allow for us to play music as well as use our phones at the same time, but then my parents can’t make me get up from the sofa to plug in their phones.

Second, the WiFi.

I love this new wifi. I’m getting a 8ms ping, and 80 mbps both download and upload. However, with the new house, we need to have 2 wifi networks to cover the whole area (I tried to get my dad to just go with a booster, but he didn’t want to do that for some reason.) These two networks are fine with me, but the network that has access to all of the printers and other devices is just out of reach from my room, which forces me to go downstairs whenever I want to print something, which is rather annoying, considering I’m a student, and I make roughly 2-3 print trips per night.

My solution is to make the Raspberry Pi into a print server so I can print from my room. You might be asking, how will you be able to print if you can’t access the network that the Pi is on? I will be using Hamachi, which has worked great for me with the PiRoom and the PiVPN. That way, as long as I have some type of wireless connection, I can print to my printers at home.

Both of these projects should be fairly small, I’ve already done the research to do them. However, the Pi I currently plan on using for these projects is giving me problems, so I don’t really know when I can start with this project.

I’ll be posting all of my progress, so stay tuned.

PiVPN [Conclusion]

I finally got my OpenVPN system to start working, however, I was still having the problem that I didn’t want to connect to my VPN inside of my house in order to connect to my Pis.

My friend told me about LogMeIn Hamachi, which he used for making mini servers in Minecraft. After doing some research about it, I found out that Hamachi allows the computer to have access to the local as well as the VPN network at the same time, which is exactly what I wanted it to do.

I had to jump through a couple of loops, however, I got both my PiVPN and my PiRoom part of the Hamachi VPN network, and it works beautifully. This is how my system looks right now:

Hamachi Setup

If you notice, PiVPN isn’t there right now, it is actually experiencing some difficulties. Nevertheless, I can access my PiRoom from all of my devices and even get solid work done outside of my home network. Even though this wasn’t my original idea, I’m still going to mark this off as a success.

Building the Websocket Server

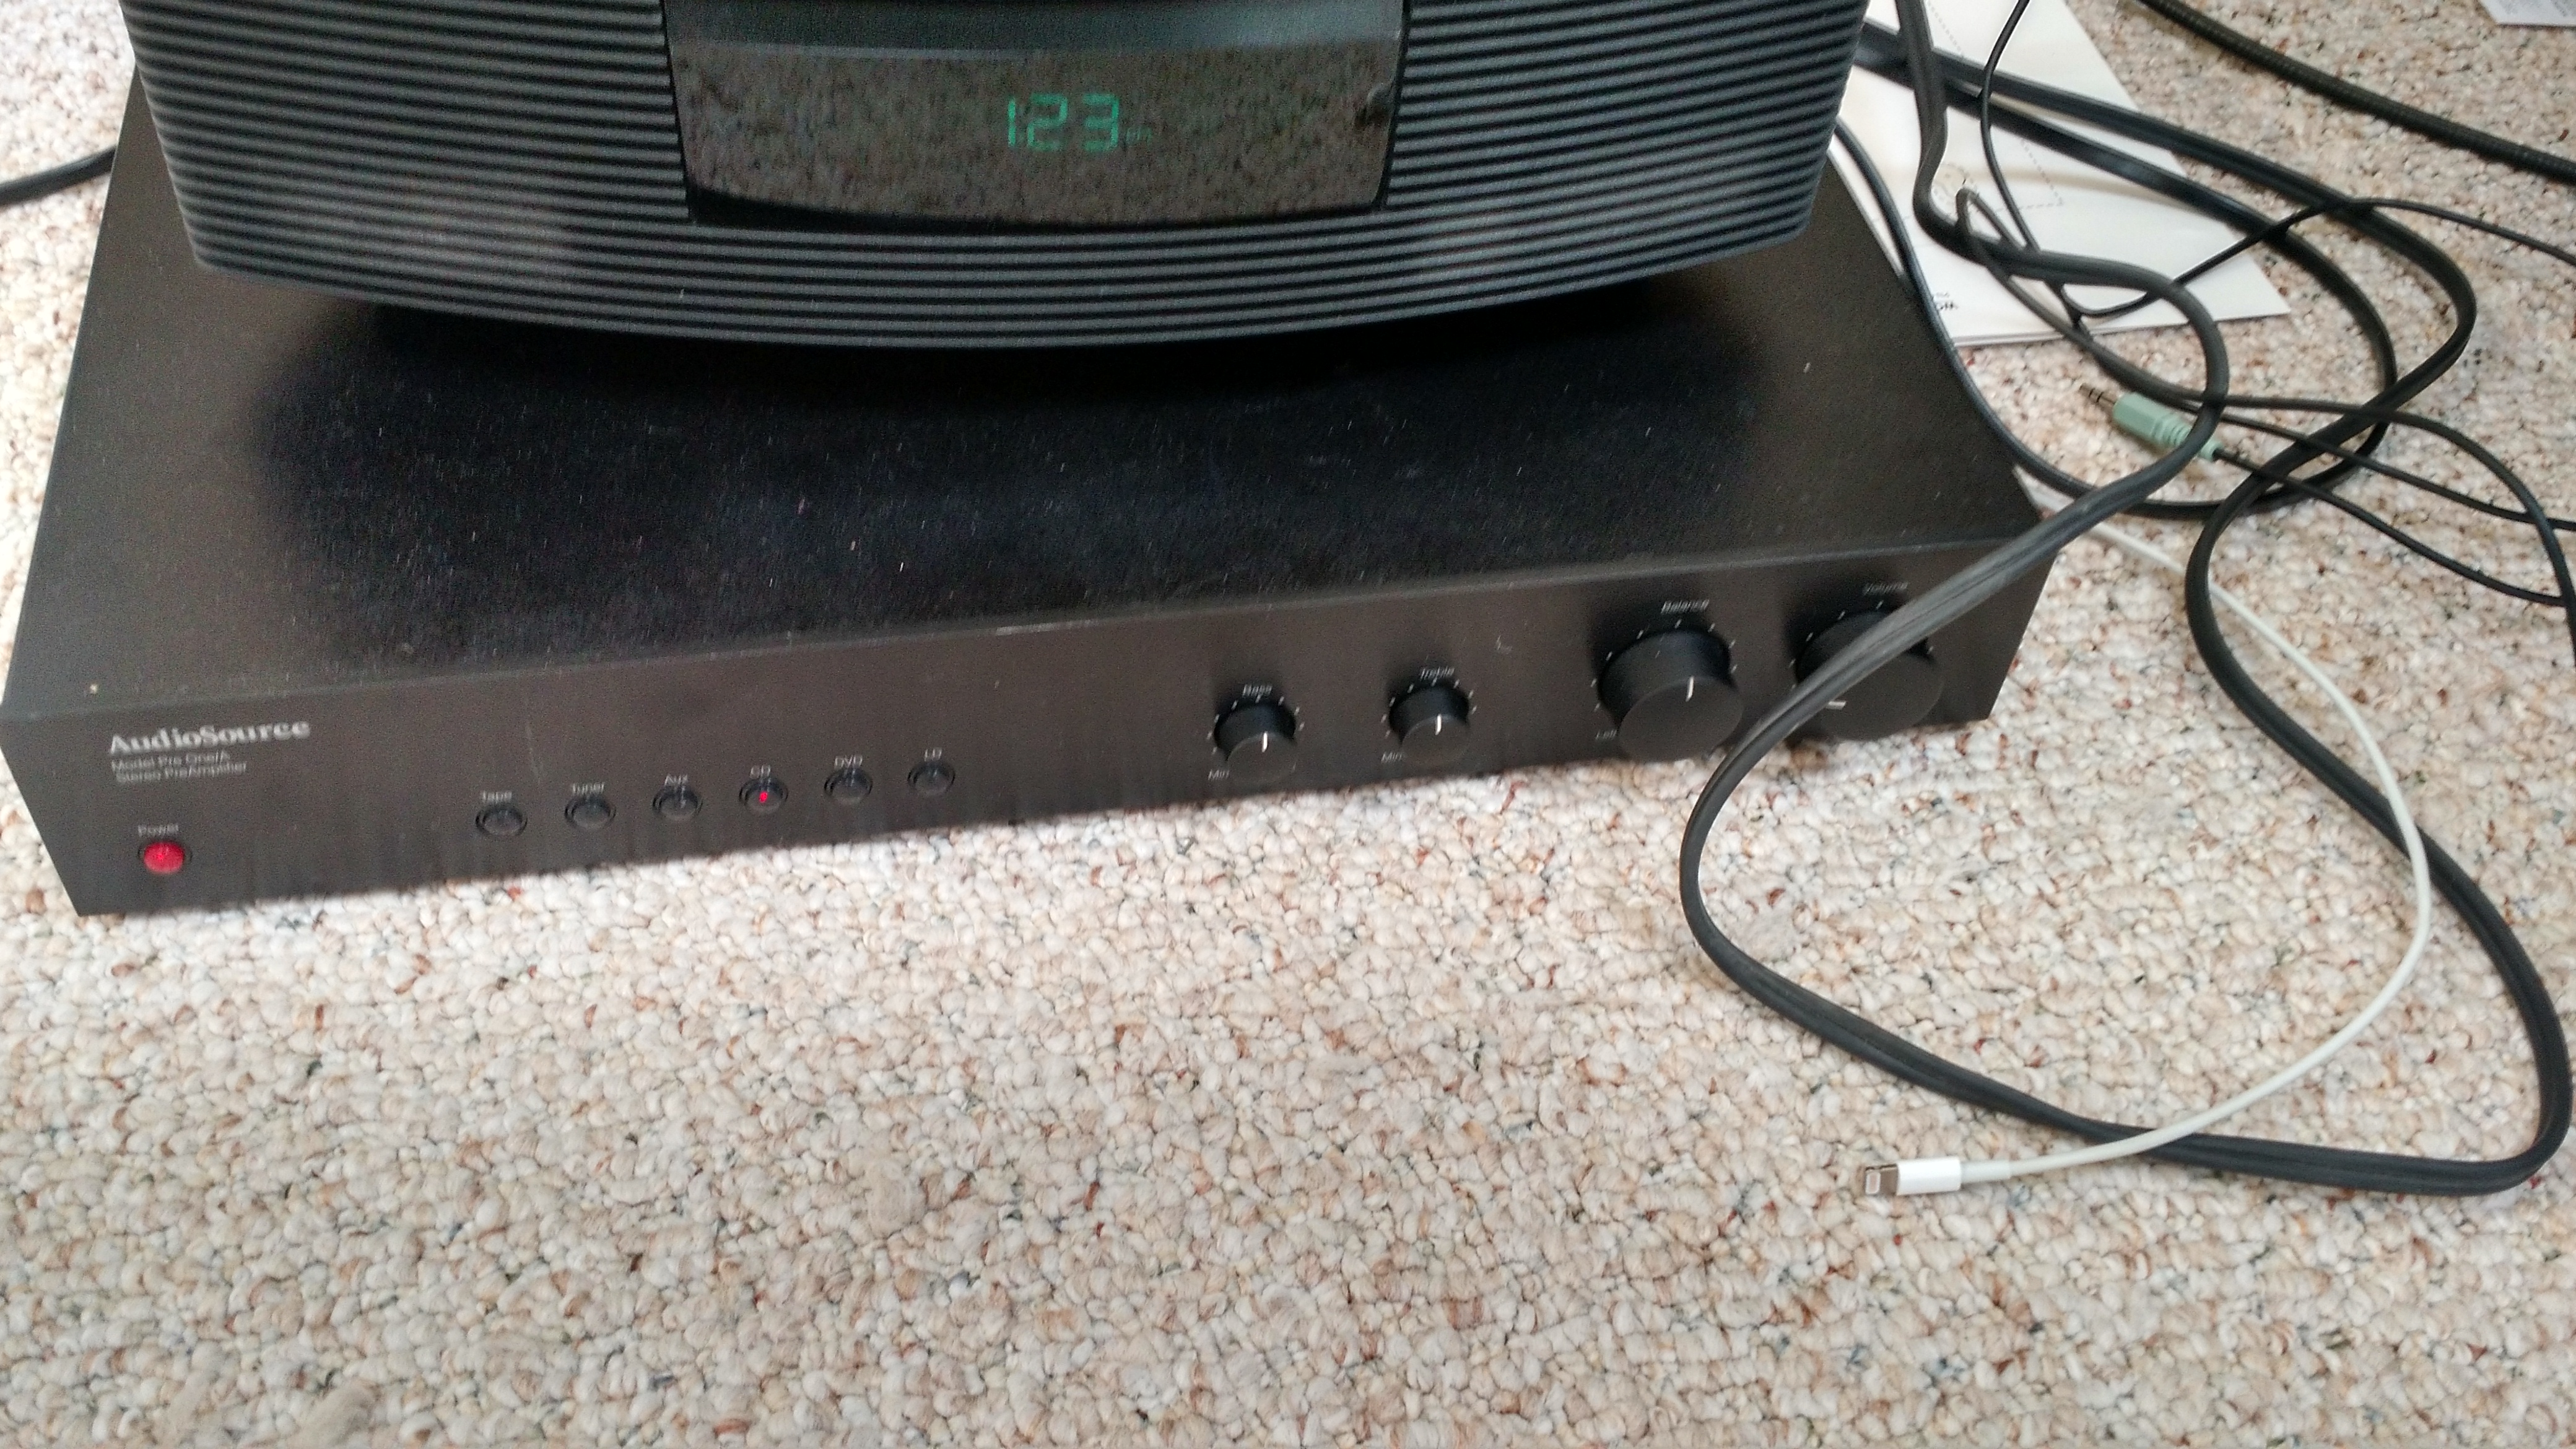
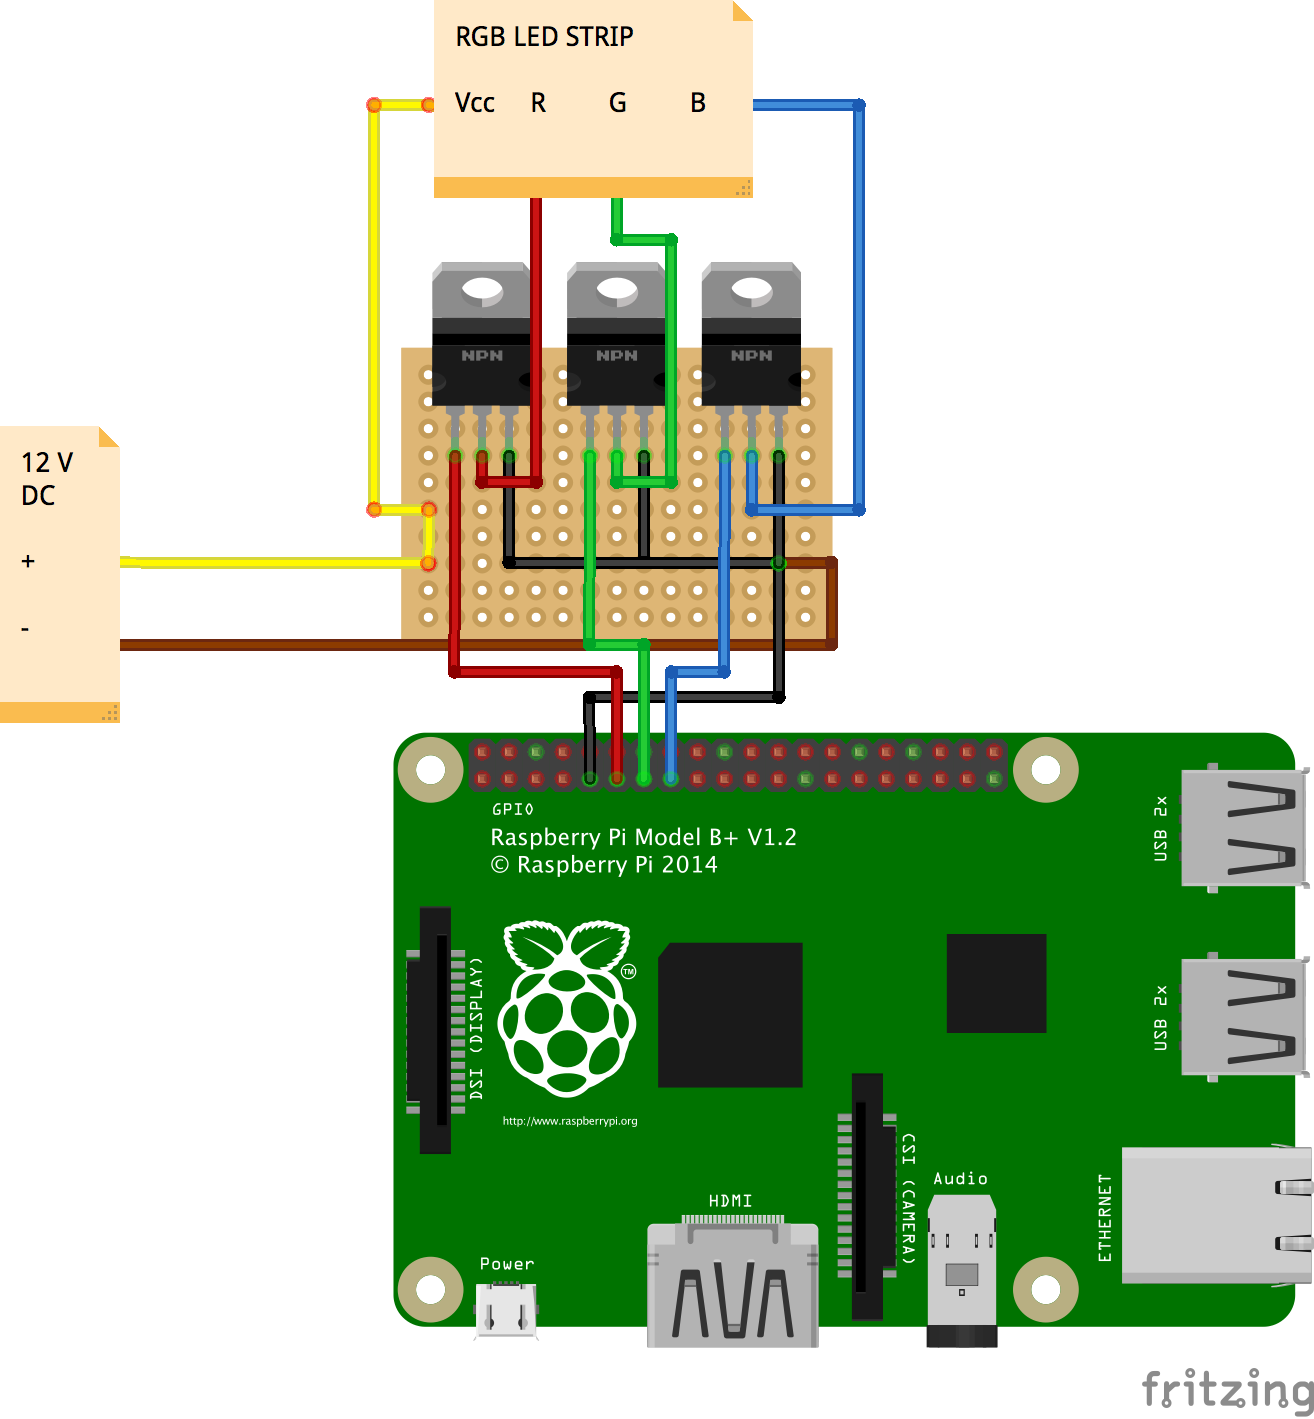
I was doing a basic outline of what I wanted this application to do, and I realized that I wanted a hardware switch for the lights as well as well as the software interface.

If there are two different interfaces, that means there will be a discordance with the hardware values compared to the web values for the lights. The only way then, to make sure everything is a-ok, is to make sure that the clients are always synced to the server, so the hardware values change the values on the clients’s webpages.

One easy and obvious solution is to simply refresh the webpage every x seconds with JavaScript, but that wouldn’t give realtime feedback, which kind of ruins the whole “home of the future” experience for me. I then looked into sending AJAX requests every x seconds, but realized that if I have more than 5 or so client webpages open at the same time, my pi would literally go on fire.

I could go around that by using a service such as pusher, which basically outsources the request to an off-site server, but I would rather buy a server than pay for a service such as pusher (huge fan of not buying things :D)

After a little more research, I found that the websockets are the way to go. They basically open a tunnel between the server and the client, where both the client and the server can communicate with each other in realtime. An easy application for this would be a simple chat application.

Since, my Pi is already built with Apache, I decided to use PHP to run my websocket server (plus PHP is the language I’m best at).

I used a library for the basic websocket functionality, which can be found here.

After that, I realized that I needed to run the PHP locally, not every time a client connects to the server. I then added another class and a small amount of code which can be run from the command line:

require_once 'WebSockets.php';

class Server extends WebSocketServer {

protected function process ($user, $message) {
$this->send($user,$message);
}
protected function connected ($user) { }
protected function closed ($user) { }
}

$server = new Server("localhost", "1738");

try {
$server->run();
}
catch (Exception $e) {
$server->stdout($e->getMessage());
}

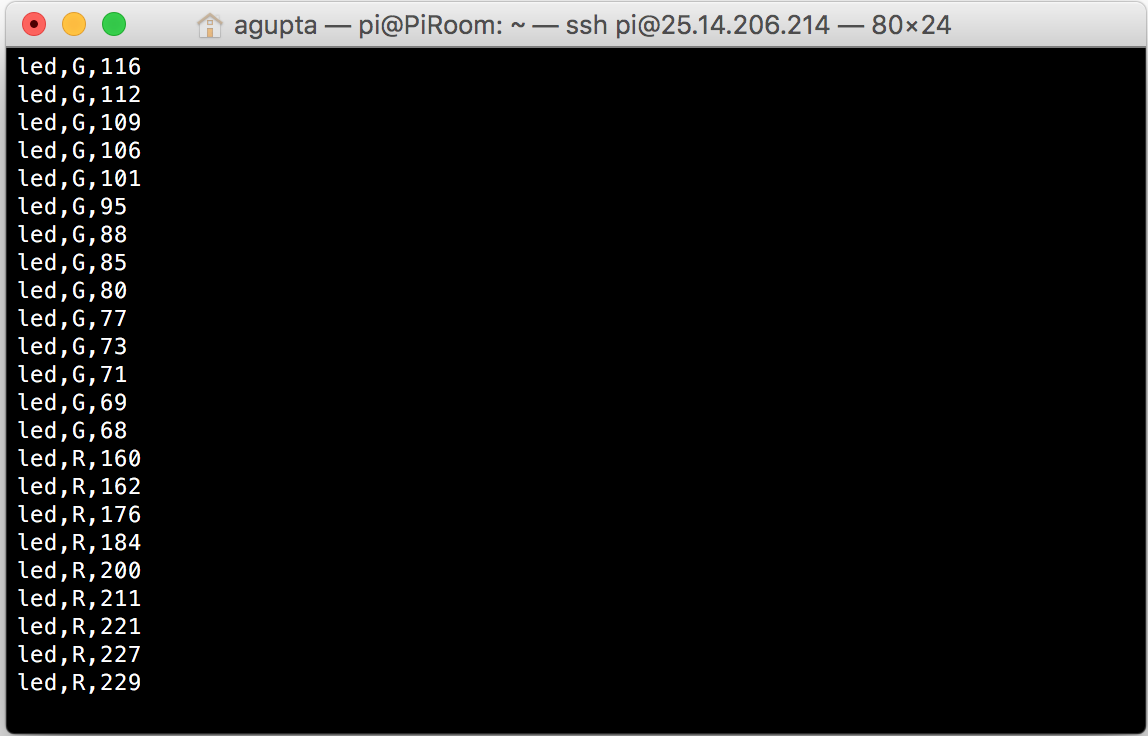
I opened up the Pi and ran this file, which gave me the following output:

Output from Websocket Server

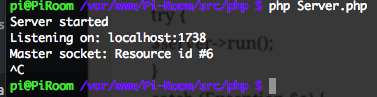
So far, it looks like the server is running smoothly. Now, I need to connect my client with my server and get them synchronous.

If you are thinking that this is overkill for a simple application such as this, that I don’t really need a hardware interface, I would have to tell you that a websocket is a lot more integral to the whole project than it initially appears. If there are multiple tabs open with the server control panel, and there isn’t a websocket set up, then the tabs would never be updated, which would be very confusing to the user. In this case, a websocket not only provides basic functionality, but also increases the expandability of the project exponentially.

Custom LED Lighting: Circuit Design

I still don’t have access to my Pi(s), but I decided to work on the electronics a bit so that I could hit the ground running when I do get access.

I’m thinking about using PWM (pulse width modulation) the LEDs from my Pi. I really don’t know how the stability will be affected with the pins running PWM for hours at a time, but I guess I’m going to find out.

Quick tangent about PWM. PWM basically turns the pins on and off really quickly to output a signal that isn’t 0% or 100% power. I will most likely be using the WiringPi or the pigpio libraries to pull this off with the Pi. However, the Pi only outputs 3.3v with it’s GPIO pins (not the 5v rails), which is not nearly enough to power the LED strip.

I decided to use 3 transistors, this allows me to still use the Pi’s PWM, and also let it deal with higher voltages. I could have gone with solid state relays, but I’m not really pushing that much current to justify the choice. I’m also aware of the added “lag” when using more parts, especially transistors, but I seriously doubt that this “lag” will affect the LED’s performance, or affect enough that the human eye can sense that something is wrong.

With all of this in mind, my current idea for the LED light controller is as follows:

RGB Controller Layout

I’m trying to do some research on whether or not I will have to cool the transistors, as they should theoretically be getting very hot. Also, it should be noted that the protoboard will be cut to be smaller than shown, I just didn’t know the size before hand. Hopefully I can get the parts ASAP and start building soon!

Basic Website: Sliders and Input Boxes

I’m still away form my Pi, but I was still working on my basic website. I wanted the sliders and the input boxes to be in accordance, so that there would be no code clashes in the future. To pull this off, I added this to my slider code:


<input id="ledRslider" name='ledRslider' type='range' min="0" max="255" step="5" class="ledSlider" oninput="ledSlider(this.value, 'R')">
<input id="ledGslider" name='ledGslider' type='range' min="0" max="255" step="5" class="ledSlider" oninput="ledSlider(this.value, 'G')">
<input id="ledBslider" name='ledBslider' type='range' min="0" max="255" step="5" class="ledSlider" oninput="ledSlider(this.value, 'B')">

The main thing to pay attention to is the


oninput="ledSlider(this.value, 'R')"

This bit of code sends the current value of the slider as well as the color of the slider to a Javascript function. The value part is obvious, but I also made the sliders send their color so that there could only be one function, opposed to three.

The corresponding JS function looks like so:


function ledSlider(val, color) {
    document.getElementById('led' + color + 'value').value = val;
}

As seen in the code above, the input box gets updated as the slider changes, and all of the input boxes will get changed to their corresponding slider, all with just one function.

So far, the end result looks like so:

Slider Gif

Now, I have to make a XMLHTTPRequest from the JS to the corresponding PHP, which will then execute the a command from the Pi, which will finally change how the lights work.

The party has just begun.

Concept Behind PiVPN

As I am getting started on the PiRoom project, I realized that I will need to work on the Pi, and there will be chances that I won’t have the Pi on me. For that, I’m using an older Pi to act as my VPN server.

I will be using the openvpn software, because of it’s popularity, mostly because it is free. Once I have this system setup on my pi, I will most likely have a link for my phone, tablet, computer, PiRoom pi, and maybe a NAS or an external harddrive connected to the Pi. The advantages of this system is all my of electronics will be safe within my own home, and I can travel light.

Another, and maybe the main advantage is that I will be assigning a static IP address to my PiRoom Pi. With this, I would run into a lot of trouble if I wanted to say, use the pi in a coffeeshop, where there is a high chance of a conflict with the dhcp server.

I haven’t delved into the system yet (I’m currently not in my house, so I don’t have access to either of my Pis), but I’m assuming that I will either be able to

  1. Access my PiRoom on my home network because I will be using my PiVPN’s wireless. In this system, the PiRoom’s IP address will stay static, so I only have to deal with one.
  2. Connect both my device as well as my PiRoom to a network made by the PiVPN, and access the PiRoom through that network. Ideally, the IP address for the PiRoom would stay constant for both, but even if there are two IP addresses, that really isn’t that much of a problem.

Nevertheless, I’m going to try to get the first system up and running, that way, I won’t accidentally forget to attach my PiRoom to my PiVPN, and be stuck with no access to my Pi.